Monday 24 February 2014

More Sunday Work at Shackerstone...

Hi guys. Today I was at Shackerstone again, helping with the various shed work. One job in particular was to carry out a water check on 3803 in preparation for its light-steam test next week. Just to make things easier, myself & Carl headed off down to the North End to collect the railways BR Class 04 shunter. Having started up nicely & created air, the 04 moved easily up through Platform 1 and into the Dock Road to collect 3803. The 2-8-0 was then duly dragged outside so that some water could be dropped out of her boiler for analysis. The 04 was then shut down whilst we carried out this task. Having checked the water and performed various other checks on & about the 38', I fired up the 04 again before pushing the GWR engine back inside. The 04 was then taken back down to the North End. Driving this beast is a bit of a different kettle of fish to the 02 for example. The 02 is diesel electric, whilst the 04 is diesel mechanical. Therefore, there are gears to think about - unlike on the 02 where there is only forward or reverse! The 04 performs well and they were reputed to be able to do 25mph quite easily for trip-working. I don't really like diesels but I don't mind shunters! At the back of the shed, Aveling & Porter "The Blue Circle" was also in steam. She was having a pre-work check carried out which involves gradually raising steam and then allowing the safety valves to lift. She has also had a bit of a livery change, with most red parts now painted black...
"Aveling & Porter The Blue Circle"
Inside the shed, "Sir Gomer" is still awaiting axle removal whilst "Dunlop No7" patiently awaits her boiler, which shouldn't be far away now...
"Peckett Dunlop No7"
After a quiet day in the shed chatting & working, I headed for home. This month's Old Glory magazine (for March) is now in stores and contains our ad for Miniature Traction Engine Weekend, amongst various other interesting bits & bobs. The event is also advertised in Old Glory's Event Guide for the Jan - June 2014 issue. Leaflets will be heading out 6 weeks prior to the event and I am trying to do as much advertising as possible this time around. If any of my readers are free over April 26th/27th, please feel free to pop over to us. It should be a very good weekend so why not nip in and say "hello"!...
"Getting Nearer By The Day"
I am now going to take a break from the railway for 2 weeks due to other commitments, but I have attended every weekend this closed season! Roll on the gala, roll on the miniature do and, ultimately, roll on the summer! Kind Regards, Sam...

Sunday 23 February 2014

Achilles Report No48: Plodding Along...

Hi guys. Today I spent the afternoon plodding on with poor old "Achilles" who is still in bits all over the place. The engine has taken a back step behind a few other tasks that I've had on but she is still very much on course. There is always something to do at the moment and what with home life, work, college, the railway and "Achilles" its all just biting a bit at the moment but I'm sure everything will fall into place soon. So, on this sunny afternoon I was pottering around still degreasing and stripping other black-liveried parts. These included the running plates which support the tanks, the cab steps and the lubricator. The lead running boards were also stripped again after having a slight reaction with the primer that was initially applied. The smokebox door received its first coat of smokebox black today, and this will be allowed to dry before being sanded, repainted, dried, sanded and repainted a third time prior to completion. The initial coat tends to show up air bubbles and thin patches but this is to be expected on the first coat. I hope to begin painting the smokebox in a week or two as well. Perhaps "Achilles" is going to demand some nights in the week too, ay?!...
"The Stripping Area"
Whilst the smokebox door was drying and the paint stripper was curing on the various bits & pieces, I decided to rustle up some masking for the smokebox. The smokebox is now very much sanded down and so I didn't really want to get too much 'standard' paint onto it. By 'standard' paint I mean car paint. Naturally car paint is high quality and hard wearing, but on a smokebox the temperatures encountered can be a little too much for it sometimes. Therefore the smokebox black: perhaps lower quality but certainly more prone to taking higher temperatures: is applied instead. However, for the front step on the locomotive, in order for the running boards to match it, matt black spray paint was the order of the day. The locomotive was duly masked and the result would have without a doubt won the "Worst Ever Effort At Masking A Smokebox Award", with honours! However, though it looked completely disgraceful in every sense of the word, the masking held firm and would do the job...which is all I required of it. The front plate was then dusted off and the heaters set to full blast in order to aid the drying process of the primer...
"What A Mess"
Two coats of primer were applied to the front step (which in fairness doesn't get anywhere near as hot as the smokebox does). Between coats the primer was sanded back in order to keep the surface flat. After the second coat the step was sanded very lightly in order to remove any 'humped' areas in the paint, which can be common if you over-spray. All of this painting is certainly a learning curve for me! With the second coat of primer sanded and dusted, the first layer of matt black was sprayed on...
"Matt Black Front Step"
When the matt black dries it will be sanded down a little to bring it flat (if necessary anyway). Following this it will probably receive a second coat just to be on the safe side. By then the running boards should be about ready to paint as well and when the engine goes back together she will have matt black running boards all of the way around, including the front step. The smokebox and chimney will, for obvious reasons, receive a couple of coats of smokebox black in order to keep their strength against the heat levels encountered during steamings. Elsewhere the rest of the locomotive is currently completely stripped and being prepared for undercoat. The engine will emmerge in a slightly lighter (more friendly I think) shade of blue with red lining. A new whistle turret has arrived and been prepared for fitment by Eddie, whilst I am currently waiting on some bronze bar so that I can make four new trunnion bearings for the expansion links. The links will then be re-riveted and both piston glands repacked prior to the engine being rebuilt. The engine will hopefully emerge in mid to late April with the latest resteam planned for the first Saturday in May. We will see. Best Regards, Sam...

Monday 17 February 2014

Sunny Sunday at Shackerstone...

Hi guys. Another quiet day at Shackerstone was enjoyed today. The railway is still closed for a few more weeks as the winter season draws to a slow end and so no trains were running. However, in the steam shed yard, two diesel engines were fired up today. Richard fired up his Drewry Class 04, and I fired up the trusty little Class 02. The latter's Rolls-Royce engine fired up easily on this very chilly day: much to my surprise. The two shunters were required in order to help with some rejigging of the rail vehicles currently in & around the shed. The shunts were carefully planned so as to keep "Sir Gomer" at the centre of everyone's attention. With the lifting of the Peckett and the removal of her damaged axle now becoming increasingly more imminent, she needs to move to a secure location further down the shed where she will not be bothered by gala engines when they arrive. I had the opportunity to drive both the 02 & the 04 today, with the latter being a nice change from diesel electric examples such as the 02. Underneath "Sir Gomer", Danny & Joe were trying their best to refit the damaged brass (soaked in oil) prior to moving the Peckett forward slightly. In the image below we can see the journal, which is in this case the axle. The cuts have been caused by the brass and the cuts in the brass have been caused by the axle and vice versa. It is a very vicious circle. As can be seen, the damage is quite severe and the axle will of course be turned and machined to remove it...
"Left-Leading Journal Showing Damage"
Eventually the brass made it back into its proper resting place and the gradual task of lowering the engine began. Groans and creeks were abundant as the old Peckett slowly settled back onto her springs, having had most of her height dropped. The next task is, believe it or not, to jack the engine up again slightly so as to remove axle weight across her wheelbase and then remove all of the springs as well as packing the boxes. The engine can then be moved very carefully the few yards to her planned resting place further down the shed. This will then allow her to be jacked up and her wheels removed. Cheers guys, Sam...

Friday 14 February 2014

AGM at CMES...

Hi guys. A quiet evening tonight at the CMES site for the Annual General Meeting. Though I currently have no loco in effect as she is scattered across the workshop in bits at present, I am still very interested in society goings on. Cheers guys, Sam...

Monday 10 February 2014

"Sir Gomer"s Job-Filled Day...

Hi guys. Today we were back at Shackerstone doing various jobs on "Sir Gomer". With most of the heavy dismantling work completed and a week or two left before she gets lifted, our attention turned to the more minor jobs around the loco. Parts would have to be cleaned, stamped and in some cases painted, whilst other areas of the loco would have to receive some protection whilst they are uncovered. One job that was completed in next to no time was to oil each of the six crank pins. These are normally encased by brasses, supplemented by a film of oil, and therefore require oiling whilst 'out in the open' as it were. Any debry or damp can induce rust and wear and this is the last thing we want, especially with the engine having some very nice looking pins...
Each pin was carefully caked in a film of thick steam oil to protect it whilst uncovered. The cold weather results in the steam oil turning more viscous and it ends up looking like treacle. This thickening action does however make it stick to any parts rather well, and therefore it is perfect for jobs such as this...
With the crank pins oiled and thus protected, attention turned to the rods. These will all be degreased and burnished in due course: one by one. Reece & Cameron took on the task of degreasing and rubbing down the forward coupling rod from the Fireman's side...
"Silly Old Rod, Always Lying About On The Job!"
We can see that this rod is the forward coupling rod as the rear end of it has the rectangular hole to accept the centre crank pin brass. The eyelet hole behind the brass holder is there to allow the rear coupling rod to be pinned through, thus inducing rotary actuation into the rear axle...
Outside, Eddie was busy with the hot-water pressure washer and was degreasing various parts. I had a little go at pressure washing in between jobs and got duly filthy in the process! The next job I was given was to make some new trimmings. Trimmings are part of a locomotive's lubrication system and feature worsted wool. The wool carries oil over into the relevant feed-way by means of capillary action. The oil works its way up through the wool, up & over into the feed-way and thus lubricates the connected part. "Sir Gomer" for example uses trimmings for all of her coupling rods, the gudgeon pins, the big ends, the glands, the valve spindles etc. Though this process may seem a little old fashioned and ineffective, it should be remembered that a steam locomotive only theoretically requires three drops of oil per mile to most parts, or so the old saying goes. With the wool in my possession, I thought I'd have a go...following a good lesson in trimming manufacture from Brian...
Copper wire is used for trimmings as, if any copper breaks away for whatever reason, the theory is that it will not score or damage bearings, unlike steel for example which will. The trimming is created by getting yourself a length of copper wire and bending it in half before twisting. You should create the loop at the top before twisting down to make the trimming the correct length. Depending on the diameter of the hole you are feeding with oil, the trimming should be made accordingly. In my case it was a coupling rod brass feed-way, and the diameter of the hole required three strands of worsted wool. The trimming should not be a tight fit in the hole, but should allow oil to pass whilst not allowing the entire quantity of the oil pot to be dumped all at once. Below we have my first attempt at a trimming (though it was a bit more attractive following some modifications!)...
"What Is That?!"
The trimming complete, it was soaked with bearing oil before being placed into its feed-way hole. The oil pot is then filled with oil so as to ensure that the capillary action begins immediately. Whilst I was making trimmings, Eddie & Cameron were doing a swell job of bringing the brake blocks back to life. Eddie was pressure washing them whilst Cameron later dried and painted them. Painted brake blocks certainly look smart...
"Good As New"
After another long day in the shed it was time to head for home. Things are slowly moving along with "Sir Gomer" and we hope to get the axle out in a week or two. There is always something to do on a steam engine though...always! Best Regards, Sam...

Monday 3 February 2014

Jiggin' in the Riggin'...

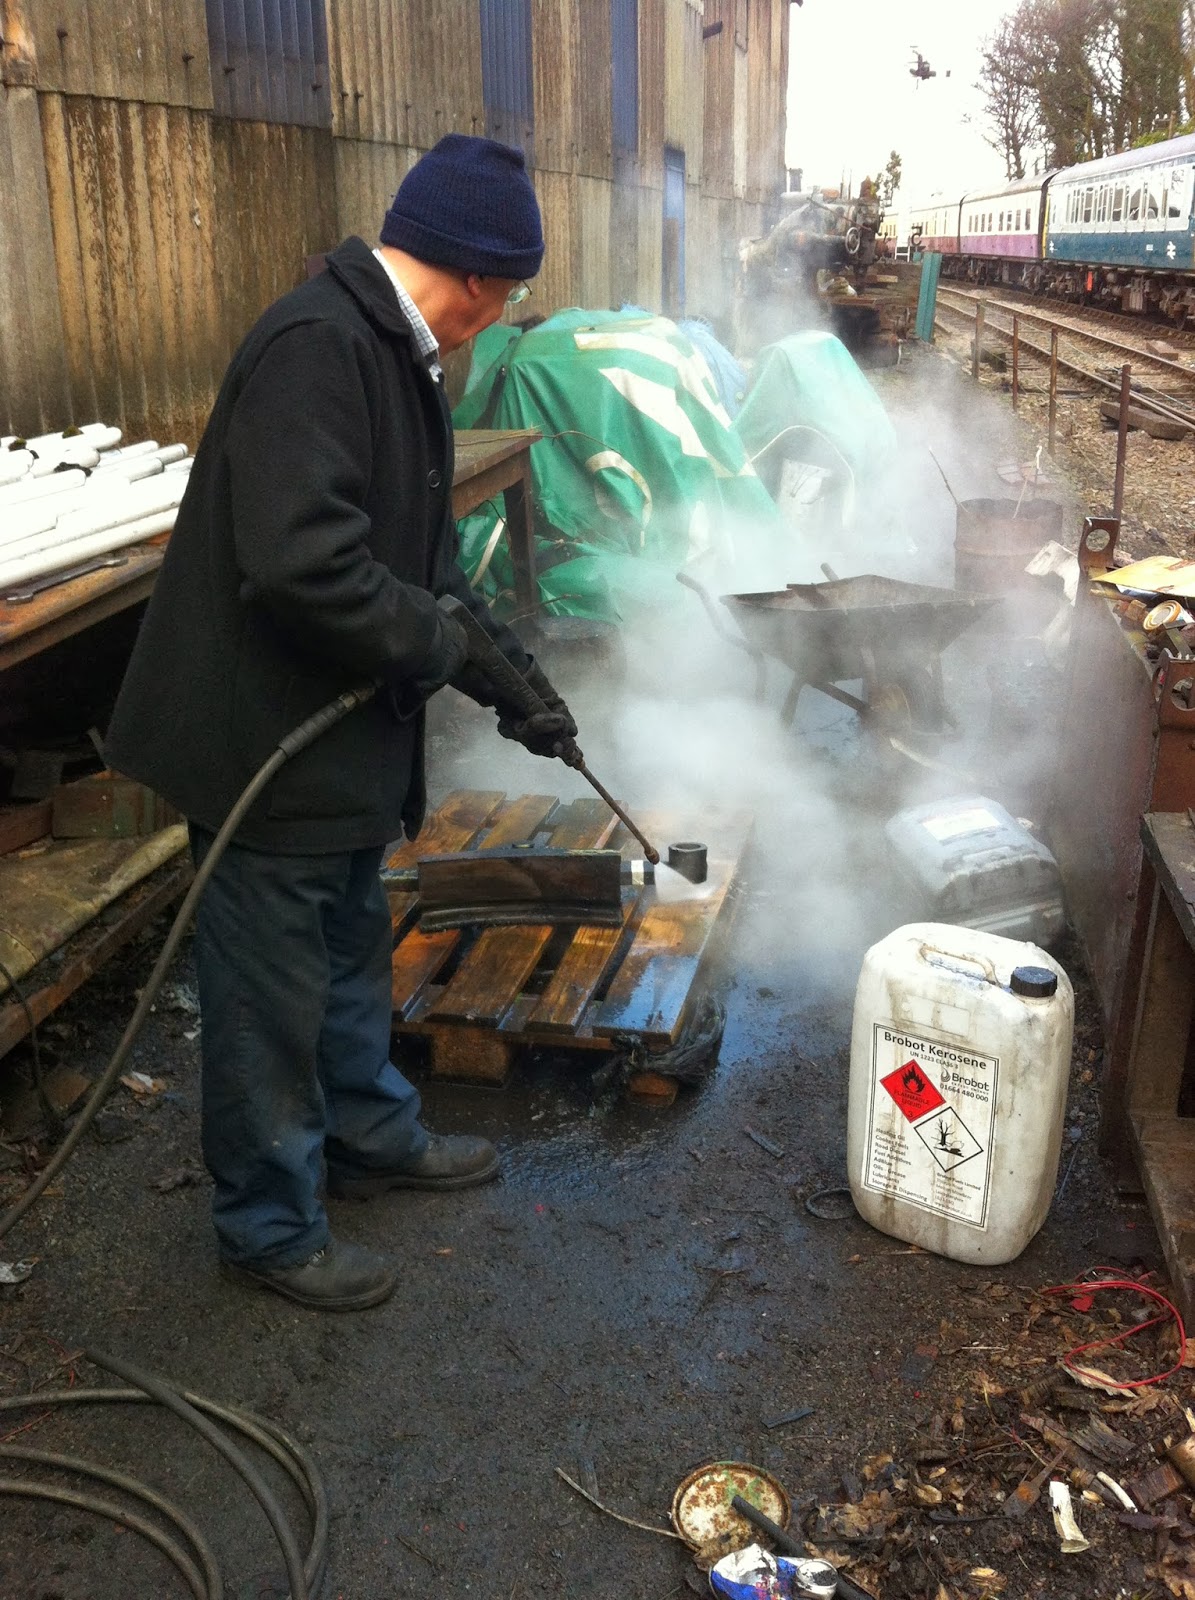
Hi guys. Today we were back at Shackerstone working on the Peckett "Sir Gomer". Last week the engine took great steps towards her axle removal by having her rods, bearings and eccentric straps removed. On Wednesday, the engine was also relieved of her brake linkage (the bars which join the three cross-members to the Steam Brake). The threaded bars are seen here in the workshop following removal...
Our task today was to remove the rest of the brake rigging: the three cross-members basically. The cross-members are fastened into the brake hangers which carry the blocks. Each wheel has a brake block and therefore each axle has a cross-member, two hangers and two brake blocks. The cross-members: when held in unison by the threaded bars: are equally connected to the steam brake, and hand brake respectively. As pressure is applied, each cross-member, and therefore each brake block hanger, is pulled against its respective wheel, with the created friction slowing and duly stopping the locomotive. It is a simple yet very effective system...but everything is heavy! "Sir Gomer" weighs around 35 tons loaded and I think most of it must be on the bottom end! In order to remove the cross-members, we thought it best to throw some long wood packing between the wheels, and then pack up to the base of the cross-member as best we could. You could then remove one of the brake hangers by removing the split-pin, washer and spacer. With one hanger off, the released end of the cross-member would put pressure onto the packing so that the other hanger could be safely removed. We managed to carry out this process three times and successfully removed the cross-members...
"Two Brake Blocks and the Centre Cross-Member"
With all of the brake rigging and hangers removed, the engine is now pretty much free of obstruction ready for lifting. The next job is to get the engine moved to the place where she will be jacked. In order to do this: as she is currently jacked up: the damaged brass will have to be heavily oiled and refitted before the engine is lowered down from her sleeper tower. She will then move forward probably 30 or 40ft before being stopped again ready for lifting. This location will take her off the inspection pit and therefore, if she isn't finished by the time our Spring Steam Gala rolls around, then the gala visitor(s) will have chance to use the pit for oiling up. Once stationed in her lifting location, "Sir Gomer" will drop all six of her springs and this will be the final straw prior to lifting. With the appropriate jacking equipment, the engine should lift easily to around 2/2.5ft in the air. This will allow all six axles to be removed if required, though it is likely that only the front and centre will be removed, with the latter only coming out for checking. The lead axle will then go out for contracted repair...
"Rear Wheel Minus Brakes"
Following our removal of the brake rigging and hangers, there was a call to go and help the guys down the line who were struggling to move a 60ft length of very heavy rail. This rail takes at least 8 people to move easily, and they had less than half that. Therefore, our stalwart team of myself, Eddie, David and Jamie jumped in the cars and headed off through the Fen Lanes to Carlton to give the lads a hand. We'll be back on "Sir Gomer" next week. Cheers guys, Sam...

Sunday 2 February 2014

Achilles Report No47: Slowly Coming On...

Hi guys. Today gave me another chance to attempt to beat the cold and continue with the work on "Achilles". With the heater on and a mug full of tea, I set to it. The main parts of the locomotive have now been separated for painting into a new blue livery, lined in red. However, the remaining parts such as the running boards, smokebox and cab steps require stripping and painting into black again. All I can say is, paint stripper seems to work well on anything that isn't a smokebox! The 'smokebox black' that has been applied had stuck wonderfully, so much so that it was very difficult to even begin to remove it. In the end, for the door, I opted to strip the top coat off with remover, and then use a wire-brush tool at high speed in order to clean off the worst of the dilapidated paint. It was then sanded by hand in order to bring the shape level and clean again. The plan is not to remove all of the paint, just to sand it down cleanly in order to produce a flat, tidy surface for repainting. Here is the result on the door...
Paint stripper was used again on the running boards and the blue of the rods. This is applied for a first coat of 5-6 minutes and then, when the paint bubbles, you can apply a second coat and leave for around 35-40 minutes. When you come back you can pull the paint off with a scraper as best as possible...
Goodbye old running board paint...
When I came back from lunch the running boards had bubbled massively. Therefore it was time to scrape them and then sand them down with light wet & dry paper. The result was two very flat and clean boards ready for painting...
"Ready to Run"
Whilst more paint stripper was left to cure on the rods, I decided to carry on with the smokebox. Its so strange seeing the loco in this state as I've never yet had the courage to bring it down to this extent. Fine sandpaper was definitely the best way with the smokebox and it allowed me to sand down the various paintwork dents and imperfections in order to bring the smokebox to the correct shape again. The smokebox is now ready for repainting into black...
"Smokebox Rubbed Down"
Elsewhere, though it wasn't really a post's worth of information, the wheels have also gone away for painting. Well, I say that, four of them have gone, the other two remained with me. Just after the loco was stripped down, and just as the major parts were about to go away, the rear axle was discovered to have very bad axleboxes. The leading two axles had wear but not too much wear: they were still in a serviceable condition. However, the rear pair were just terrible: they were very, very bad. As much as I tried to talk myself out of it, unfortunately they just had to be replaced. Therefore, at least one of the wheels had to come off, and the axle had to be checked. With a lot of heat and a quick bit of work with a press, the wheel popped off easily...
"Rear Axle and Old Boxes"
The two old axleboxes were later stripped of their springs and new material was purchased. The axle was turned in a lathe to remove some terrible imperfections that would affect its service life. It came off the lathe looking really well and I am very pleased with it. It has since been blessed with two brand new axleboxes which are a nice running fit. The removed wheel has been pressed back on and pinned before the wheel-set was sent away to join its two brothers for painting. Well, that's another job done. Moving right along! Best Regards, Sam...